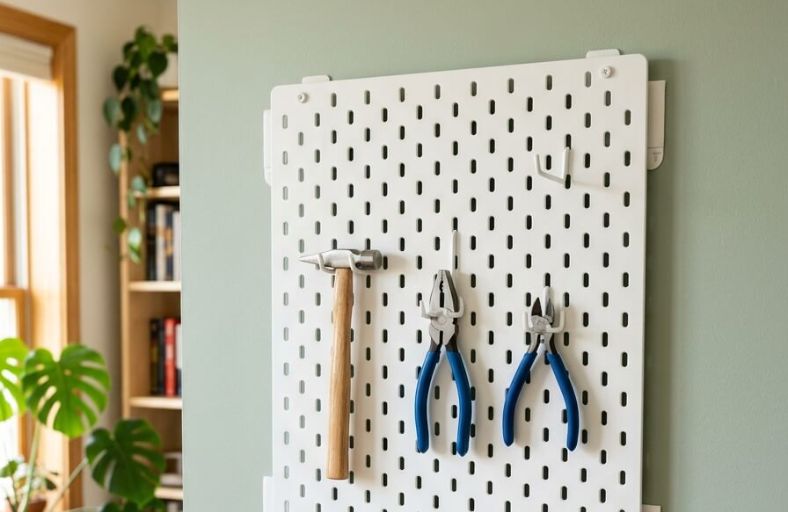
Blank walls often feel like missed opportunities for organization, yet the fear of damaging drywall keeps many homeowners and renters from tapping into that valuable vertical real estate.
Drilling into studs and patching holes is a labor-intensive chore that discourages spontaneous design changes.
Fortunately, the era of permanent installations has evolved into a world of damage-free creativity.
Whether you are working within the strict limitations of a rental agreement or simply want a clutter-free home that evolves with your changing needs, there are several clever techniques to mount a sturdy, reliable pegboard system without leaving a single mark behind.
High-Strength Adhesive Mounting Strips
For those who want a clean, minimalist look without the commitment of hardware, industrial-grade adhesive strips are a fantastic alternative.
These are not your typical office-supply tapes; they are specifically engineered for heavy-duty mounting, capable of supporting significant weight when applied correctly.
To use this method, you will need a lightweight pegboard and a set of heavy-duty double-sided mounting strips designed for wall surfaces.
The secret to success here is preparation. First, clean both the back of the pegboard and the wall surface with isopropyl alcohol to ensure there is no dust or oil residue.
Next, apply the strips generously along the perimeter and near the center of the board.
Press the board firmly against the wall for at least 30 seconds to ensure a secure bond. Because these adhesives work best on flat, smooth surfaces, they are ideal for painted drywall or finished wood.
If you ever need to move your organizer, you can simply stretch the adhesive tabs according to the manufacturer’s instructions to release them from the wall without peeling the paint. This method gives you total freedom to redecorate whenever the mood strikes.
Peel-and-Stick Adhesive Panels
If you are intimidated by the measuring and spacing required for traditional mounting, modular peel-and-stick pegboard panels are your best friend.
These systems have gained massive popularity because they come with a factory-applied, high-bond adhesive backing.
They are essentially the sticker version of a pegboard, making them perfect for smaller spaces or quick DIY projects where you want to add organization in a matter of minutes.
The installation process is incredibly straightforward. You peel off the protective backing, align the panel, and press it directly onto your wall.
Many of these sets are designed to interlock, allowing you to create a custom shape that fits perfectly into a specific nook, such as above a craft desk or near a coffee station.
Because they are modular, you do not have to worry about one large, heavy sheet; instead, you can build your storage system piece by piece.
They are especially effective in rentals or dorm rooms where you want to add a functional aesthetic without risking your security deposit.
Just be sure to check the weight capacity for your specific brand, as these are best suited for lighter items like jewelry, craft tools, or lightweight office supplies.
Freestanding Frame or Desktop Stand
Sometimes, the best way to handle wall storage is to avoid the wall entirely. Building a simple wooden frame that rests on your desk or floor allows you to utilize your pegboard as a vertical display without any contact with your wall finish.
This approach is excellent for renters or homeowners who prefer to keep their walls pristine, or for those who want their organization system to be mobile.
To create this, you can build a stable “A-frame” structure or a simple rectangular base using standard lumber from a hardware store. Attach your pegboard to this frame using small screws or bolts.
The beauty of this method is that it creates a dual-sided storage option if you design it correctly, or it can simply lean against a wall for a relaxed, industrial vibe. If you place it on a desk, it acts as a privacy screen and a tool organizer in one.
Because the structure is freestanding, you can paint the frame to match your decor or add casters to the bottom for easy repositioning.
This is the ultimate solution for anyone who craves a flexible workspace that can adapt to new layouts in seconds.
Over-the-Door or Furniture Mounting
Utilizing existing furniture or door frames is an ingenious way to incorporate a pegboard without ever touching your walls.
By leveraging heavy-duty zip ties, adjustable metal clamps, or even sturdy adhesive hooks, you can secure a pegboard to the side of a bookshelf, the back of a pantry door, or an over-the-door rack designed for shoe storage. This method is perfect for small apartment living where every square inch counts.
The key to a successful furniture mount is ensuring the board itself is lightweight—such as thin MDF or plastic, so it does not cause the furniture to tip or the door hinges to sag. When mounting to a shelf, ensure the board is flush with the side panel to maintain a clean profile.
If you choose to hang it over a door, you can purchase an inexpensive over-the-door metal rack and secure the pegboard to the rack’s hooks using heavy-duty twist ties or specialized mounting clips.
This creates a hidden, organized station that is completely removable. It turns a dead zone, like the back of a closet or the side of a desk, into a high-functioning hub for your most-used items.
Tension Rod or Pole System
For those who want a floor-to-ceiling display or a desk-to-shelf setup, the tension system is the ultimate no-drill powerhouse.
By using high-tension curtain rods or floor-to-ceiling poles, you create a rigid structure that provides a perfect anchor for your pegboard.
This method is incredibly stable and allows you to hold significantly more weight than adhesive strips because the pressure is distributed between two solid surfaces, such as your floor and ceiling or your desk surface and the underside of a wall-mounted cabinet.
To set this up, place two heavy-duty tension poles vertically, ensuring they are spaced to match the width of your pegboard.
Use strong nylon cable ties or specialized pipe clamps to attach the board to the poles. Once the poles are tension-locked into place, your pegboard is essentially a solid, wall-mounted unit that doesn’t actually touch the wall.
This is a dream for renters with high ceilings or anyone wanting a room divider that doubles as a functional tool board.
It provides a sleek, modern, and industrial aesthetic while keeping your security deposit perfectly intact.
Mounting Method Comparison
| Method | Best For | Weight Capacity | Removability |
| Adhesive Strips | Small/Light items | Low | Excellent |
| Peel-and-Stick | Decorative/Crafts | Low | Good |
| Freestanding | Desktops/Mobile | Medium | Excellent |
| Furniture Mount | Hidden storage | Medium | Excellent |
| Tension System | Heavy duty/Large | High | Excellent |