A jagged, raw-edged tear in a sleek emerald-green leather sofa is more than just a blemish. It is a heart-stopping sight that can ruin the entire curated vibe of your living room.
Seeing the internal foam peeking through the hide feels like a personal failure in home maintenance. It turns a quiet luxury centerpiece into an eyesore that screams for attention.
However, this aesthetic nightmare does not mean your investment is lost. By moving beyond the initial panic and applying a few technical, science-backed protocols, you can restore that buttery finish to its former glory.
Surface Decontamination
Before you even think about glue, you must address the microscopic barrier of oils and dust sitting on your sofa. Adhesion is a molecular game.
Skin oils or pet dander will keep your repair kit from bonding. Start by dabbing the area with a 1:1 mixture of white vinegar and warm water, or a specialized leather cleaner.
Be careful not to soak the leather, as excess moisture can cause water rings or further damage the hide. Instead, use a soft, damp cloth to gently lift away contaminants.
| Cleaner Type | Best For | Benefit |
| Vinegar/Water | Everyday oils | pH-balanced and gentle |
| Leather Cleaner | Heavy grime | Professional-grade safety |
| Rubbing Alcohol | Synthetic leather | Removes stubborn residues |
This step ensures a clean slate, allowing the adhesive to penetrate the fibrous network of the hide for a permanent bond.
Precision Edge Trimming
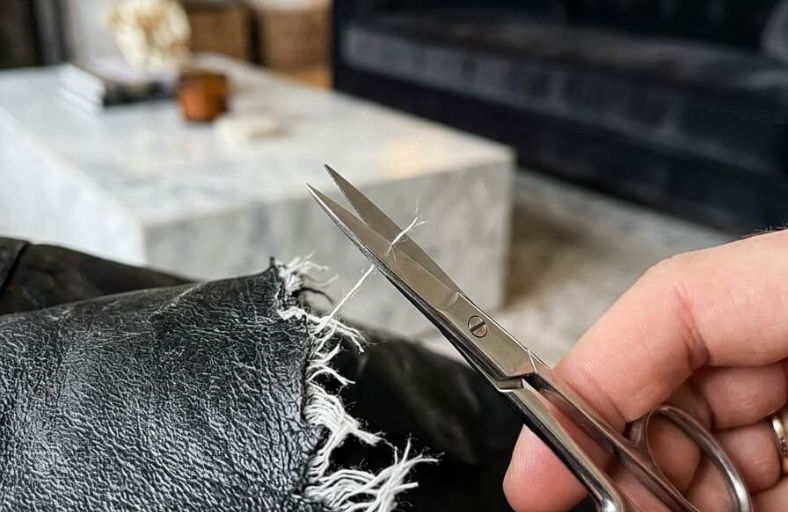
A rip rarely happens in a straight, clean line. Usually, the edges are worn, featuring tiny threads and ragged fibers that stick out like a sore thumb. To achieve a professional finish, you need to perform topographical debridement.
Grab a pair of high-precision scissors or a sharp scalpel to carefully trim away these frayed bits.
The goal is to create a cleaner edge that allows for a seamless butt joint later in the process.
Be patient here; cutting too much into the healthy leather will enlarge the wound, so focus only on the loose, hanging fibers that would otherwise create bumps in your final repair.
Sub-Patch Reinforcement
For a repair to withstand the daily stress of someone sitting down, it needs a structural scaffold from beneath.
A sub-patch acts as a secondary skin, distributing weight so the tear doesn’t “zip” open again.
Choose a high-tensile fabric, mesh, or thin leather patch and cut it to be about 50% larger than the actual rip.
A professional tip is to round the corners of your patch; sharp angles are prone to lifting over time, while rounded edges stay flat and invisible.
Use tweezers to slide this patch through the opening, ensuring it lies perfectly flat against the internal foam without any lumps or ridges.
Flexible Adhesive Bonding
This is the most critical material choice you will make. Never use standard superglue on leather; it cures into a brittle, glass-like state that will crack the moment someone sits on the cushion.
Instead, opt for a specialized, flexible leather adhesive that maintains elasticity after drying.
Use a toothpick or small spatula to apply a thin, even bead of glue to the underside of the leather flap where it meets the sub-patch.
Once the glue is in place, use your fingers to pinch the two sides of the tear together into a straight, even line.
Hold this in place for several minutes or place a flat weight on top to ensure a firm, uniform bond.
Volumetric Filling
Even after structural bonding, the tear usually leaves a concave void or a “valley” that disrupts the surface plane. To fix this, you need to apply a professional “Heavy Filler” or repair compound.
The golden rule here is to apply the filler in multiple thin layers rather than one thick glob. A thick application leads to excessive shrinkage or cracking during the curing process.
Use a palette knife at a 20 to 45 degree angle to spread the paste evenly across the gap.
Force dry each layer with a hairdryer on low heat for a few minutes before adding the next one.
This building process ensures the filler remains flexible and well-bonded to the sub-patch, eventually making the surface flush with the surrounding leather hide.
Topographical Graining
If you leave the filler perfectly smooth, it will reflect light differently than the rest of the sofa, making the repair glaringly obvious. To achieve an invisible finish, you must replicate the leather’s unique texture.
| Graining Method | Best For | Technical Note |
| Manual Stippling | Small nicks/smooth hides | Uses a sponge or Q-tip |
| Graining Paper | General textures | Heat-cured for quick results |
| Silicone Mold | High-end/pebbled grain | Provides a 1:1 texture copy |
For small repairs, manual stippling with a damp sponge or even a Q-tip during the final skim coat can create a realistic porous look.
For larger areas or pebbled leather, using a grain mold or graining paper is more effective.
You can create a mold by taking a silicone impression of an undamaged section of the couch.
Press this mold into the wet filler and set it with heat to leave an exact copy of the grain pattern.
Chromatic Blending
The final step is chromatic synthesis, where you blend the repair into the original color of the hide.
Avoid the temptation to paint the leather with a brush, as this creates visible stroke marks.
Instead, apply your custom-mixed colorant to a sponge and use a dabbing motion to feather the edges. This dabbing technique creates a soft gradient that tricks the eye into seeing a continuous surface.
Be mindful of the dry-down shift; colorants often change shades as the solvent evaporates, so test your mix on a hidden spot first.
Once the color is perfect, apply a leather finish or sealant to protect the area from future friction and wear.
Finally, allow the entire repair to cure untouched for 24 to 48 hours to ensure maximum durability.